
Prism
- acolborn
- Jun 22, 2021
- 6 min read
Updated: Jun 28, 2021
Every year I used to gather up in a car with friends and make a pilgrimage to Maker Faire.
If you have never been to Maker Faire it may be impossible to explain. ~180,000 people come together every year of all shapes and sizes: kids and families, artists, tinkerers, engineers and weirdos to build and share and see things they’ve never seen before.
Maker Faire is dogfighting drones getting into angry, crashing mid-air collisions, giant tanks of underwater submersible robots, an entire airplane hanger sized hall blacked out and full of LEDs and glowing things.
There is an area on the map devoted to “Fire Robots.”
People are there to show off everything new in open electronics and 3D printing. There is even a section for weird steampunk people who dress up in Victorian outfits but with goggles and laser pistols.
The main stage is completely powered by audience members on bicycles and another stage blasts music using the electrical storm of a Tesla coil to vibrate the air into song. You get the picture. But, I'd like to talk about one of the projects we brought.
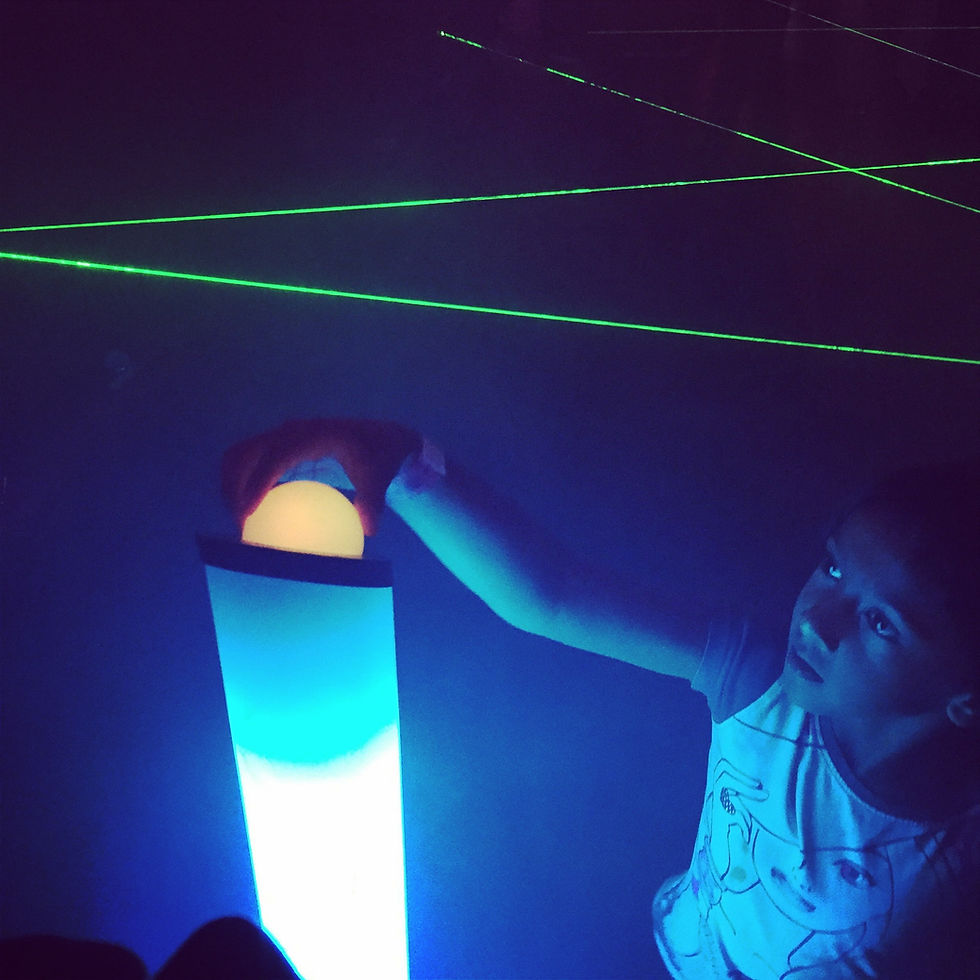
A LASER MAZE
After taking our Cereal Machine to Maker Faire, our little team had all agreed to try and return every year with something new and interesting.
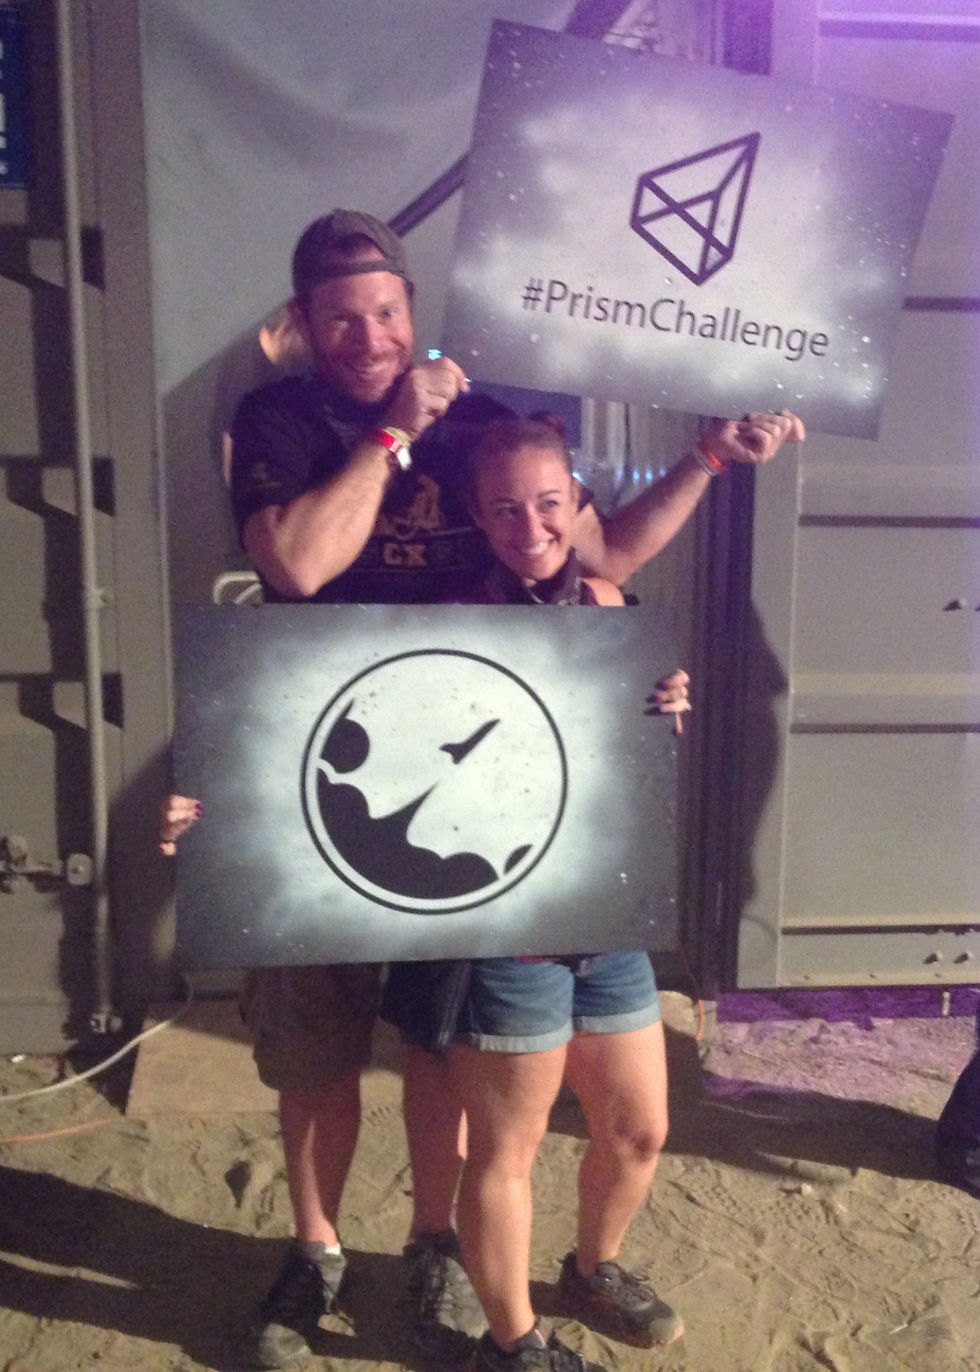
This year the project we had applied with was Prism, a laser maze we had originally built in about 3 days in a hot (think 130°F), dusty shipping container for a music festival.
Your mission was to jump and dive and crawl through a maze of lasers, steal the glowing orb at the end and make it out alive without touching any lasers (like Mission Impossible or “that one movie with Catherine Zeta Jones”).
If you hit any lasers, the game penalizes you and you don’t get to rank at the top of the leader board with the parkour masters types who took the game a little too seriously.
After the first day, we had to run and make signs. Without signs people are wary of being lured into a dark shipping container at a music festival for some reason. With signs, we had a line 300 people deep.
IMPROVEMENTS
As you can imagine the version we hacked together in a few days was in desperate need of help. To prepare it for Maker Faire, we set out to do it right.
In the original version, the laser mounts we came up with were a product of obvious desperation: a laser pointer zip-tied to a stick on a janky homemade ball mount. These had to go.
We also replaced the anemic red laser pointers with brighter and safer green laser diodes which gave us the option of turning them on and off electronically (instead of tightening a zip-tie around it to hold down the on button - ugh).
To replace the laser and sensor mounts, I designed and 3D printed adapters to allow us to anchor them to ball mount camera swivels.


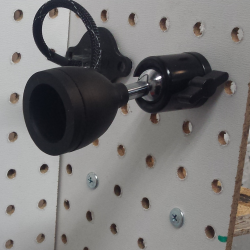
The sensor mount we designed, is an evolution of an Instructable we saw online involving a toilet paper tube and aluminum foil.
This version is 3D printed on our Form1+ by laser curing UV resin.
It screws right onto the ball mount swivel with it’s 1/4-20 threads and has cap that tightens down over the front to hold in place a piece of diffusion paper and the little photoresistor we use to detect if the beam has been broken. It also has a cable that comes out through a rubber grommet to hook into a RJ11 jack in the wall (the kind old people use to plug in their phones).
PULSING LASERS
Since we had switched to laser diodes, it only made sense for us to connect them with our programming and make them do our bidding.
Playing around, I hooked up the power for the laser through a transistor. Then by using the PWM (pulse width modulation) signal off an Arduino I could trip the transistor to open and close the circuit 490 times a second making the laser flash on and off faster than your eye can see.

By programming different PWM values, you can change the amount the laser is on versus the amount that it’s off during each 2 microsecond pulse, tricking your eye into interpreting the laser as brighter or dimmer. This means that with a couple keystrokes we could dim the lasers, turn them on and off individually and even pulse them like the .gif above for a super cool start sequence.
DESIGNING OUR OWN CUSTOM PRINTED CIRCUIT BOARD
Once we decided how it was going to be wired, I set to work designing a printed circuit board to sit on top of an Arduino Mega. This PCB would control all the lasers, help gather data from the light sensors and to hook into switches and indicator LEDs on our control unit.

I decided to try out a free, open-source program called Fritzing for the first time. I started by digitally breadboarding out the circuit and then mapped the trace. For a final touch I (totally unnecessarily) integrated the Prism logo Meritt had designed right into the copper of the circuit on the back of board.
When it was done we sent it off to Laen and team at OSH Park in Oregon. They began in a community makerspace pooling resources among their members to make their own PCBs. Now they fab boards for makers all over the world. Our little shield was printed on a sheet amongst friends, 399 other boards from 66 other projects and prototypes.
THE LASER CONTROL UNIT
Once we had all the components soldered on the Prism board. We began hooking everything up. The laser cut box we put everything in was christened by Emma the Laser Control Unit (LCU). Everything was wired back to the LCU.
Inside was our Arduino topped with our custom Prism Shield doing most of the heavy lifting in terms of controlling the lasers and gathering the sensor data.

Next to it sat a Raspberry Pi that took all the data the Arduino was gathering and sent it to the pretty app Andy Axton built for the project to record and display everyone’s scores.
Powering the LCU was a computer power supply Kaleb had hacked to give us 12V, 5V and 3V rails.
Out of the back of the box there were 6 RJ45 ethernet to plug in all the lasers and sensors. We also added a USB port wired back to the Raspberry Pi. This allowed Emma to hook up an external keyboard so she could make on the fly adjustments by command line right onto that little 2.8″ screen in the center of the LCU.
EXECUTION
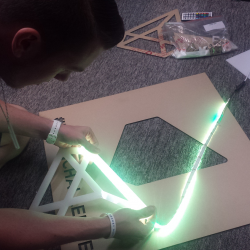
The laser maze went together in a flurry of drilling and soldering and welding.
We tried everything out in a purpose built test rig. We spent several days stress testing the lasers and running through all the game mechanics to make sure everything was ready to take to Maker Faire.

Even with all the preparation, we were still fixing things and making improvements right until the very end.
In an attempt to add a bit of an Indiana Jones element to the story we built glowing pedestal (out of chicken feed tube from a farm supply website).
On it was placed a “magical” glowing orb (light up doggy toy) for the participants to steal. When the orb is taken it triggers the pedestal to turn red and angry and a PiCam to take their picture and send it to the app to be matched with their score.
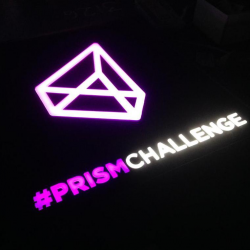
We had learned from our first day at the music festival that signage was important. So as a final touch for Maker Faire, Meritt (like one of those creepy deep sea Anglerfish) thought it would be fun to try and attract people out of the darkness with something that glowed.

Once it was ready (or close enough) we crammed all the parts into cars (we couldn’t fit everything into one) and headed off.
We built our own walls for the maze and did the final wiring right there on the floor at Maker Faire. After it was all set up, exhausted from the days of building we enjoyed the tradition beer and paella with our giant family of Makers.
Over the course of the wonderfully exhausting weekend we fought off a never-ending line of kids and watched nearly 1000 people of all sizes (though mostly on the smaller side) dodge lasers and crawl hands and knees through our maze.


Comments